iPhone Camera Settings: Best Settings for Better Photos and Video
The right iPhone camera settings can make a noticeable difference in photo quality, video quality, exposure, composition, and how consistently your camera behaves.
But there is no single combination of settings that is “best” for every iPhone.
A standard iPhone 14, iPhone 14 Pro, iPhone 15, iPhone 16, and iPhone 17 do not have exactly the same camera hardware or controls. Pro models also add features that are not available on the standard models.
The good news is that you do not need to manually control everything to get excellent results.
For most people, the best approach is to:
- Use the highest-quality format that fits your storage needs.
- Keep the main camera at its native optical focal lengths when possible.
- Use exposure adjustment when lighting is difficult.
- Turn on Grid and Level for better composition.
- Use Photographic Styles according to your preferred look.
- Preserve the settings you actually want to keep.
- Use macro and 0.5x deliberately instead of relying on them blindly.
- Use Action mode when movement requires stabilization.
- Edit photos afterward instead of trying to force every adjustment while shooting.
Apple also provides different camera tools depending on the iPhone model and iOS version, so some options described below may not appear on every iPhone.
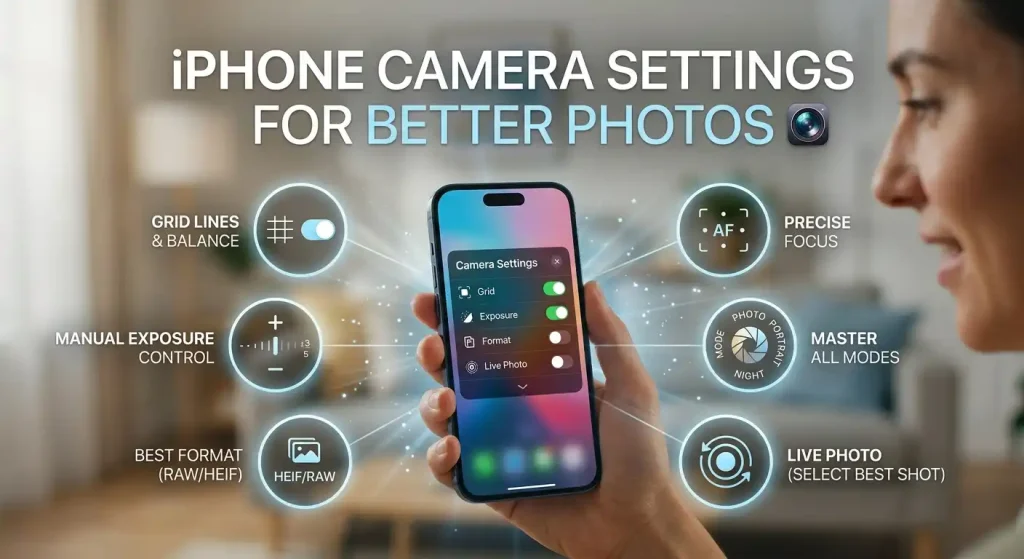
How to Open iPhone Camera Settings
There are two places you will use most often.
The Settings app
Open:
Settings → Camera
Depending on your iPhone model, you may see options related to:
- Formats
- Preserve Settings
- Record Video
- Record Slo-mo
- Grid
- Level
- Mirror Front Camera
- Macro Control
- Photographic Styles
- Prioritize Faster Shooting
- Lens Correction
- View Outside the Frame
- Scene Detection
- ProRAW or resolution controls
- Camera Control on supported models
The exact list changes between iPhone generations.
The Camera app
Open the Camera app and use the on-screen controls or swipe up from the camera modes to access available controls.
Apple’s current Camera interface allows users to customize which camera tools appear above the frame on supported versions of iOS. Available controls can include flash, Live Photo, timer, exposure, styles, depth, and other options depending on the device and camera mode.
This distinction is important:
Settings → Camera controls how the camera behaves overall.
Camera app controls let you change settings while composing an individual shot.
The Most Important iPhone Camera Options
You do not need to change every available setting.
Start with the options that have the biggest practical effect.
Formats
The Formats section controls how your iPhone stores photos and videos.
Depending on your model, you may have options involving:
- High Efficiency
- Most Compatible
- Resolution Control
- Apple ProRAW
- ProRAW resolution
Supported newer iPhones can also provide higher-resolution capture options.
For example, Apple documents 24MP and 48MP photo options on supported models, while ProRAW can provide additional information for editing at the cost of larger files.
Preserve Settings
This is one of the most useful areas if you are tired of the Camera app resetting your preferred choices.
Apple allows supported iPhones to preserve settings such as:
- Camera mode
- Photographic Style
- Macro Control
- Exposure Adjustment
- Night Mode
- Portrait Zoom
- Action Mode
- ProRAW and resolution controls
- Apple ProRes
- Live Photo
The available options depend on the iPhone model.
For example, if you frequently use a particular exposure adjustment, turning on Exposure Adjustment under Preserve Settings can prevent the setting from returning to its default behavior each time you reopen Camera.
Best iPhone Camera Settings for Photo Quality
For everyday photography, there is no magic setting that automatically creates the best photograph.
Good results usually come from combining appropriate resolution, good lighting, stable composition, sensible exposure, and the correct lens.
A practical starting setup is:
| Setting | Practical starting point |
|---|---|
| Format | High Efficiency for most users |
| Resolution | Use higher resolution when you need extra detail |
| Grid | On |
| Level | On |
| Lens | Use the appropriate optical lens |
| Flash | Auto or Off depending on the scene |
| Live Photo | On if you value motion/context; Off when you want a simpler still |
| Photographic Style | Standard or your preferred style |
| Exposure | Adjust only when needed |
| Night Mode | Let the phone choose when appropriate |
| Macro | Use when genuinely close to the subject |
| HDR/computational processing | Generally leave automatic |
Turn on Grid and Level
Grid lines make it easier to compose photographs.
They can help with:
- Horizons
- Buildings
- Symmetry
- Portrait composition
- Rule-of-thirds framing
The Level indicator can also help keep your phone straight.
Apple provides both under:
Settings → Camera → Grid / Level
The exact interface can vary with the iOS version.
Use the correct lens instead of excessive digital zoom
If your iPhone provides multiple optical focal lengths, use them where practical.
Digital zoom can be useful, but pushing it too far generally gives you less detail than using an available optical camera or moving closer to the subject.
For example, an iPhone 14 Pro provides 0.5x, 1x, 2x, and 3x optical options through its camera system, while newer models have different combinations.
iPhone 14 Camera Settings for Best Quality
The standard iPhone 14 has a dual-camera system with a 12MP Main camera and 12MP Ultra Wide camera.
It supports:
- Photographic Styles
- Night mode
- Portrait mode
- Deep Fusion
- Smart HDR
- 0.5x Ultra Wide
- 1x Main camera
- 4K video recording
- Action mode
- Cinematic mode
Apple’s specifications list a 12MP Main camera with sensor-shift optical image stabilization and a 12MP Ultra Wide camera.
For iPhone 14 camera settings for best quality, a good starting point is:
- Keep Grid on.
- Use 1x for normal photography.
- Use 0.5x for genuinely wide scenes.
- Avoid unnecessary digital zoom.
- Use Night mode when the phone activates it in low light.
- Adjust exposure when a bright sky or dark subject causes the automatic exposure to look wrong.
- Use Photographic Styles if you want a consistent look.
- Record important video in 4K when storage allows.
The standard iPhone 14 should not be configured as though it were an iPhone 14 Pro. Its camera hardware is different.
iPhone 14 Pro Camera Settings for Best Quality
The iPhone 14 Pro is considerably more flexible.
Its Pro camera system includes:
- 48MP Main
- 12MP Ultra Wide
- 12MP 2x Telephoto
- 12MP 3x Telephoto
- Macro photography
- Apple ProRAW
- Photographic Styles
- Night mode
- ProRes
- Action mode
Apple also provides a 48MP Main camera and multiple optical focal lengths on the 14 Pro.
For iPhone 14 Pro camera settings for best quality, consider:
- Use the Main camera for everyday 1x photography.
- Use 2x when you want a tighter composition without relying on digital zoom.
- Use 3x for subjects that benefit from the dedicated telephoto lens.
- Use Macro mode for close subjects.
- Use ProRAW when you genuinely intend to edit the photograph extensively.
- Keep Grid and Level enabled.
- Use exposure adjustment when highlights or shadows need correction.
- Use 48MP capture selectively rather than for every casual photograph.
Should you always use 48MP?
No.
More pixels can provide more detail, but the larger file size and shooting conditions matter.
For ordinary social media photographs or casual snapshots, the default computational photography workflow can be more convenient.
Use higher-resolution capture when you have a reason, such as:
- Cropping
- Printing
- Detailed landscapes
- Product photography
- Fine textures
- Extensive post-processing
iPhone 14 Pro Max Camera Settings
The iPhone 14 Pro Max uses a very similar Pro camera system to the 14 Pro, so most iPhone 14 Pro Max camera settings recommendations are the same.
The important difference is not a completely different camera philosophy.
The same principles apply:
- Use 1x for general photography.
- Use 2x for a tighter optical-quality composition.
- Use 3x when the telephoto perspective is appropriate.
- Use Macro when close focusing is needed.
- Use ProRAW for serious editing.
- Use exposure adjustment when the automatic exposure is not ideal.
If you are searching specifically for iPhone 14 Pro Max camera settings for best quality, concentrate on choosing the correct lens, managing exposure, and selecting the appropriate resolution rather than trying to change dozens of settings.
iPhone 15 Camera Settings for Best Quality
The standard iPhone 15 introduced a 48MP Main camera and a 24MP default high-resolution photo workflow, along with a 2x optical-quality option created from the Main camera. Apple describes the system as providing 0.5x, 1x, and 2x optical-quality framing options.
For iPhone 15 camera settings for best quality:
- Use 1x for general photographs.
- Use 2x when you need tighter framing without immediately resorting to digital zoom.
- Use 0.5x for landscapes and large groups when the Ultra Wide perspective is appropriate.
- Use the 48MP capability when you need extra detail.
- Keep Grid and Level on if they help your composition.
- Use Photographic Styles to establish a consistent look.
The standard iPhone 15 should still be distinguished from the iPhone 15 Pro because the camera systems are different.
iPhone 16 Camera Settings for Best Quality
The standard iPhone 16 uses a 48MP Fusion Main camera, a 12MP Ultra Wide camera, and a 12MP 2x Telephoto option generated through the Main camera system.
It also adds Camera Control and supports macro photography, Photographic Styles, and Action mode.
For iPhone 16 camera settings for best quality:
- Use 1x for general photography.
- Use 2x for optical-quality tighter framing.
- Use 0.5x for wider scenes.
- Use Macro when the subject is close enough to benefit from it.
- Experiment with Photographic Styles rather than relying entirely on post-processing.
- Use Camera Control for supported on-device camera adjustments.
- Keep higher-resolution capture for situations where additional detail is useful.
Camera Control can provide access to controls such as exposure, depth, zoom, cameras, styles, and tone on supported iPhone models.
iPhone 17 Camera Settings for Best Quality
The standard iPhone 17 expands the camera system compared with earlier standard iPhones.
Apple lists a 48MP Dual Fusion camera system consisting of a 48MP Fusion Main and 48MP Fusion Ultra Wide, with support for 24MP and 48MP super-high-resolution photos and 48MP macro photography.
For iPhone 17 camera settings for best quality:
- Use the Main camera for general photography.
- Use the Ultra Wide camera when the scene requires a wider perspective.
- Use 2x optical-quality framing when you want a tighter composition.
- Use the higher-resolution modes when extra detail is useful.
- Use the latest-generation Photographic Styles to create a preferred look.
- Use Macro when photographing close subjects.
- Use Action mode for movement where stabilization matters.
- Take advantage of the newer camera controls rather than manually changing every setting.
The iPhone 17 also introduces additional front-camera behavior through Center Stage. Apple says the front camera can automatically zoom and rotate to keep people in the frame for supported photo and video situations.
What about “iPhone camera settings 17”?
If you have an iPhone 17, the most important settings are not dramatically different from the general principles in this guide.
The hardware has changed, but the fundamentals remain:
Choose the right lens → compose carefully → control exposure when necessary → select the appropriate resolution → edit afterward.
iPhone Pro Camera Settings
Pro models provide additional options, but more controls do not automatically mean better photographs.
The main Pro-specific settings worth understanding are:
- ProRAW
- Resolution control
- ProRes
- Multiple optical focal lengths
- Macro
- Action mode
- Exposure adjustment
- Photographic Styles
- Camera Control on supported generations
Apple ProRAW
Apple ProRAW combines RAW image information with iPhone image processing.
This can provide more flexibility when adjusting:
- Exposure
- Color
- White balance
- Highlights
- Shadows
The tradeoff is file size.
Apple specifically notes that ProRAW files retain more image information and therefore require more storage than standard photos.
Use ProRAW when you plan to edit.
For casual photographs, it is usually unnecessary.
Exposure, ISO and Shutter Speed on iPhone
This is an area where many iPhone camera guides become misleading.
People search for:
- ISO iPhone
- Adjust ISO iPhone
- Adjust shutter speed iPhone
- Adjust aperture iPhone
- Advanced camera settings iPhone
But the native Camera app does not historically expose full manual controls in the same way as a dedicated manual camera application.
Adjust exposure on iPhone
This is built directly into Apple’s Camera app.
Open Camera, tap the subject, then use the exposure control to make the image brighter or darker.
You can also lock focus and exposure by touching and holding the focus area until AE/AF Lock appears. Apple documents this behavior in its current Camera guide.
This is one of the most useful manual controls for everyday photography.
What about ISO?
ISO controls sensor sensitivity in traditional camera terminology.
On many iPhones, the native Camera app manages ISO automatically as part of its computational photography system.
If you specifically want manual ISO control, you generally need a camera application that exposes manual controls on your particular iPhone.
That is different from changing the normal exposure slider.
Can you adjust shutter speed on iPhone?
The standard Camera app generally manages shutter speed automatically.
Apple’s current documentation now describes manual shutter-speed control on supported newer Pro models, along with manual aperture and white balance controls.
Therefore, the answer depends on your iPhone generation and software.
If your iPhone does not expose a Shutter Speed control in Camera, do not assume you are missing a hidden setting.
Can you manually adjust aperture?
On most iPhone cameras, the physical aperture of the lens is fixed.
Some newer supported Pro models provide software controls for supported lens aperture behavior, but this is not a universal iPhone Camera setting.
Apple’s current documentation specifically identifies manual lens-aperture control on supported iPhone 18 Pro models.
For older models such as the iPhone 14 Pro, do not expect a general manual aperture slider in Apple’s native Camera app.
iPhone Camera Presets and Photographic Styles
The phrase iPhone camera presets can refer to several different things.
Apple’s built-in equivalent is Photographic Styles on supported models.
A Photographic Style changes the look of your photographs while preserving the overall character of the scene.
Depending on the generation, you can adjust aspects such as:
- Tone
- Color
- Warmth
- Style intensity
Apple’s current documentation says supported newer Photographic Styles can be customized, while compatible models can also preserve the selected style between Camera sessions.
Are Photographic Styles the same as filters?
Not exactly.
A traditional filter generally applies a visual effect across an image.
Photographic Styles are integrated into the camera’s image-processing workflow.
That makes them useful if you want your photographs to consistently have a particular appearance.
For most people, Standard is a good neutral starting point.
If you prefer warmer skin tones, stronger contrast, or another visual character, experiment with the available styles and adjust them rather than blindly copying somebody else’s preset.
Best iPhone Photo Edit Settings
The best iPhone photo edit settings depend on the photograph.
There is no universal combination that should be applied to every image.
The Photos app provides adjustments for areas such as:
- Exposure
- Brilliance
- Highlights
- Shadows
- Contrast
- Brightness
- Black Point
- Saturation
- Vibrance
- Warmth
- Tint
- Sharpness
- Definition
- Noise Reduction
- Vignette
The exact editing controls can vary by iOS version.
A practical editing order
Instead of moving every slider, try this sequence:
1. Exposure
Correct the overall brightness first.
2. Highlights
Reduce excessive brightness in skies, windows, or reflective surfaces.
3. Shadows
Recover useful detail in darker areas when possible.
4. Contrast
Increase or reduce overall separation between light and dark areas.
5. Vibrance or Saturation
Use these carefully.
Too much color adjustment can make skin and natural scenes look unrealistic.
6. Definition or Sharpness
Use moderate adjustments.
Over-sharpening can make edges look artificial.
7. Warmth
Adjust the color temperature if the photograph looks too blue or too yellow.
Apple’s Photos app also provides automatic enhancement, and its editing interface lets you compare the adjusted version with the original before saving.
Best iPhone Settings for Selfies
Selfie quality depends heavily on lighting and distance.
For better selfies:
- Face a window or another soft light source.
- Avoid strong light directly behind you.
- Keep the lens clean.
- Avoid excessive digital zoom.
- Use the front camera’s portrait capabilities when appropriate.
- Check whether Mirror Front Camera matches your preference.
- Use exposure adjustment if your face is too dark or too bright.
- Avoid over-editing skin.
Newer iPhones also provide more advanced front-camera features.
For example, Apple says the iPhone 17 family supports Center Stage with the front camera, allowing automatic framing behavior for supported photos and video calls.
Macro Mode on iPhone
Macro photography is designed for subjects that are very close to the camera.
On supported iPhones, the Camera app can automatically switch to the Ultra Wide camera for macro photography.
Apple provides a Macro Control option that lets you control this automatic switching.
If the camera suddenly changes perspective when you move close to an object, this automatic macro transition is usually why.
When should you use Macro?
Macro is useful for:
- Flowers
- Insects
- Small objects
- Textures
- Jewelry
- Product details
- Electronics
- Food details
If the image becomes blurry, move slightly farther away or switch to the appropriate camera option.
Apple specifically recommends moving back or switching to .5x when a close-up image becomes blurry.
0.5x Camera on iPhone
The 0.5x camera is the Ultra Wide camera on supported iPhones.
It is useful for:
- Landscapes
- Architecture
- Large groups
- Small rooms
- Creative perspective
- Subjects that do not fit into the normal 1x frame
But 0.5x is not automatically better.
Ultra Wide lenses can introduce perspective distortion, particularly around the edges.
For portraits, 1x or a longer focal length is often more flattering.
What about 0.5 camera on iPhone XR or iPhone X?
The iPhone XR and iPhone X do not have a dedicated 0.5x Ultra Wide rear camera.
That means an app cannot magically create the same true optical 0.5x camera perspective without appropriate hardware.
A third-party app may provide digital zoom controls or other effects, but that is not equivalent to having a physical Ultra Wide camera.
This distinction is important when searching for terms such as 0.5 camera iPhone XR, 0.5 camera on iPhone X, or 0.5 camera iPhone XR app.
2x Portrait Mode on iPhone 13
The exact Portrait zoom options depend on the iPhone model and available cameras.
Some models use the Main camera to provide a 2x framing option, while others have dedicated telephoto hardware.
The important principle is to choose the focal length that gives you the desired perspective rather than assuming 2x is always the best portrait setting.
For a natural-looking portrait:
- Keep the subject separated from the background.
- Avoid extremely close framing.
- Use good, even light.
- Check hair and clothing edges around the artificial background blur.
- Try different distances before changing the zoom.
Action Mode Camera Settings
Action mode is designed to provide additional stabilization for video when the camera or subject is moving.
It is useful for:
- Walking
- Running
- Cycling
- Sports
- Children moving quickly
- Handheld movement
- Travel footage
The tradeoff is that Action mode can have different resolution or lighting requirements depending on the iPhone generation.
For example, Apple lists Action mode up to 2.8K at 60 fps on the iPhone 14, iPhone 16, and iPhone 17 standard models.
Use it when stabilization is the priority.
For a stationary subject, normal video may be preferable.
Best iPhone Video Settings
For everyday high-quality video, 4K is usually the sensible starting point on supported iPhones.
Common choices include:
- 4K at 30 fps for general video
- 4K at 60 fps for smoother motion
- 24 fps where a cinematic motion style is desired
- Action mode for heavy movement
- Cinematic mode for supported depth-of-field effects
Higher frame rates require more storage and can require more light.
Do not automatically select 60 fps for every situation.
In lower light, a lower frame rate can sometimes be more practical because each frame can receive more exposure time.
How to Adjust Camera Settings on iPhone While Taking a Photo
For a quick adjustment:
- Open Camera.
- Select Photo mode.
- Tap the subject.
- Adjust focus and exposure.
- Swipe up or open the Camera Controls menu for additional options.
- Select the lens or zoom level you need.
- Choose the appropriate style if desired.
- Compose the image.
- Take the photograph.
Apple’s current Camera interface allows exposure adjustment directly from the shooting interface, and supported models can expose additional controls through Camera Control.
How to Save Your Preferred Camera Settings
If you change a setting every time you open Camera, Preserve Settings can save you time.
Go to:
Settings → Camera → Preserve Settings
Depending on the model, you may be able to preserve:
- Camera Mode
- Photographic Style
- Macro Control
- Exposure Adjustment
- Night Mode
- Portrait Zoom
- Action Mode
- ProRAW and Resolution Control
- ProRes
- Live Photo
Apple documents these options as model-dependent rather than universal.
This is especially useful if you consistently shoot in a particular mode.
How to Reset iPhone Camera Settings
There is an important distinction here.
iOS does not provide one universal button called “Reset Camera Settings” that independently resets every camera preference while leaving every other system setting untouched.
You can reset certain camera preferences manually.
For example:
- Change Photographic Style back to Standard.
- Turn off preserved camera settings.
- Restore camera tool customization to the default tools where supported.
- Return exposure to its normal position.
- Restore other camera options manually.
Apple’s current Camera interface includes a Reset to Essentials option for customizing the visible camera tools.
Reset all iPhone settings
If you are troubleshooting a broader system problem, Apple also provides:
Settings → General → Transfer or Reset iPhone → Reset → Reset All Settings
This is much broader than resetting the camera.
It resets system preferences but does not delete your photos, videos, apps, messages, or other personal data.
Do not choose Erase All Content and Settings unless you actually intend to erase the device.
Scanning a Code on iPhone
You do not need a special camera app to scan a QR code on a supported iPhone.
To scan a code:
- Open Camera.
- Select Photo mode.
- Point the camera at the QR code.
- Keep the code inside the frame.
- Tap the notification or link that appears.
Apple also provides a Scan Code control through Control Center. On supported models, Camera Control can also be configured to open the Code Scanner.
If QR scanning does not work
Check that:
- The entire code is visible.
- The camera is focused.
- There is enough light.
- The code is not severely damaged.
- You are not holding the phone too close.
- The Camera app can clearly see the code.
A flashlight can help when the surrounding area is dark.
Camera Settings for Different Types of Photography
Instead of memorizing dozens of settings, use a situation-based approach.
For landscapes
Try:
- 0.5x for very wide scenes
- 1x for natural perspective
- Grid and Level on
- Higher resolution when fine detail matters
- Lower exposure if the sky is becoming too bright
For portraits
Try:
- 1x or an appropriate telephoto perspective
- Portrait mode when you want background separation
- Good natural light
- Moderate exposure
- Avoid extreme Ultra Wide distortion
For food photography
Try:
- 1x
- Macro for genuine close-up details
- Soft side lighting
- Moderate exposure
- Avoid excessive sharpening
For night photography
Try:
- Stable hands or a tripod
- Night mode when available
- Avoid unnecessary digital zoom
- Reduce exposure if bright lights are blowing out
- Give the camera enough time to capture the scene
For moving subjects
Try:
- Faster shutter behavior through the phone’s automatic system
- Burst shooting where appropriate
- Good lighting
- Action mode for video
- Keep the subject within the focus area
A Simple Recommended iPhone Camera Setup
If you do not want to experiment with every option, start here:
Grid: ON
Level: ON
Photographic Style: Standard
Flash: Auto
Live Photo: Your preference
Macro Control: ON if you frequently shoot close subjects
Exposure Adjustment: Use only when needed
Night Mode: Auto
Video: 4K 30 fps for general use
Action Mode: Use for significant movement
High Resolution: Use when extra detail is actually useful
ProRAW: OFF for everyday photography
This is a starting configuration, not a universal “best” setup.
Your preferred settings should change according to how you photograph.
iPhone Camera Settings by Generation
| iPhone generation | Important camera considerations |
|---|---|
| iPhone 11 / 12 | Exposure control, Night mode, Photographic Styles on supported generations, multiple camera options depending on model |
| iPhone 13 | Different camera combinations by model, including Pro telephoto options |
| iPhone 14 | 12MP dual-camera system on standard model |
| iPhone 14 Pro / Pro Max | 48MP Main, 2x and 3x telephoto options, ProRAW, macro |
| iPhone 15 | 48MP Main on standard model, 24MP default high-resolution workflow, 2x optical-quality option |
| iPhone 16 | 48MP Fusion Main, 12MP Ultra Wide, 2x optical-quality option, Camera Control |
| iPhone 17 | 48MP Fusion Main and 48MP Fusion Ultra Wide, 48MP macro, newer Photographic Styles |
| iPhone 17 Pro / Pro Max | More advanced Pro camera system, ProRAW and professional video capabilities |
The exact capabilities vary between standard, Plus, Pro, and Pro Max models, so the model name alone is not always enough to determine which camera controls are available. Apple’s specifications confirm substantial differences between the standard and Pro camera systems.
Do You Need a Third-Party Camera App?
Not necessarily.
Apple’s Camera app is sufficient for most everyday photography.
A third-party camera application becomes more useful when you specifically need controls that your iPhone’s native Camera app does not expose, such as more detailed manual control over:
- ISO
- Shutter speed
- Focus
- White balance
- Exposure behavior
- Histograms
- Other professional controls
The native Camera app has become more advanced over time, so the exact answer depends on your iPhone generation.
If your goal is simply better everyday photographs, learning exposure, lens selection, composition, and editing is usually more valuable than installing a manual camera app.
Common iPhone Camera Setting Mistakes
Using 48MP for every photo
Higher resolution is not automatically better for every situation.
Use it when the additional detail is useful.
Using digital zoom too aggressively
If you have an available optical or optical-quality focal length, use it instead.
Keeping exposure too bright
A slightly darker image can sometimes preserve more highlight detail than an overexposed photograph.
Using 0.5x for portraits
Ultra Wide cameras can exaggerate perspective, particularly near the edges.
Editing every slider
More editing does not automatically mean a better photograph.
Using ProRAW without editing
ProRAW is primarily valuable when you intend to make substantial adjustments afterward.
Otherwise, the larger files may not provide enough practical benefit for everyday snapshots.
Ignoring the lens
Fingerprints, dust, or smudges on the camera lens can reduce image quality before any software setting becomes relevant.
What Are the Best iPhone Camera Settings Overall?
For most people, the best approach is not to search for a single secret configuration.
Instead:
- Use the correct lens.
- Keep the camera lens clean.
- Use Grid and Level if they help composition.
- Adjust exposure when automatic exposure misses the look you want.
- Use Photographic Styles to establish a preferred appearance.
- Use Macro only for close subjects.
- Use 0.5x when you genuinely need a wider field of view.
- Use 2x or telephoto options instead of excessive digital zoom.
- Use 4K video when you need high-quality footage.
- Use ProRAW or higher-resolution capture selectively.
- Edit exposure, highlights, shadows, and color afterward when necessary.
- Preserve settings that you repeatedly change.
The biggest improvement usually comes from understanding why you are changing a setting rather than copying a list of “best settings.”
FAQ
Why do my iPhone camera settings keep changing?
Some Camera settings are designed to return to their defaults when you reopen the app. Apple provides Settings → Camera → Preserve Settings for supported options such as Camera Mode, Photographic Style, Exposure Adjustment, Macro Control, Night Mode, Action Mode, and other model-dependent settings.
Does using 48MP always make an iPhone photo better?
No. It can provide additional detail and flexibility for cropping or editing, but it also produces larger files and is not necessary for every photograph. The best resolution depends on how you intend to use the image.
Why does my iPhone camera automatically switch to 0.5x when I get close to something?
On supported models, the Camera app can automatically switch to the Ultra Wide camera for macro photography. Macro Control lets you manage that automatic behavior.
What is the easiest way to improve iPhone photos without changing many settings?
Keep the lens clean, use good light, choose the appropriate lens, tap the subject to control focus and exposure, and avoid unnecessary digital zoom. Composition and lighting usually matter more than changing every available camera option.